Showing posts with label tutorials. Show all posts

Sunday, December 21, 2014

Tutorial - string ornaments

When collecting paper for the recycle bin, I found some nice red cardboard, I was reminded of this tutorial, and decided to make some string ornaments together with my kids.
A quick and easy project, but the result is really nice. 
We hung our ornaments in the tree, but you could also use them as gift tags or other decoration.
Here's a small tutorial:
1. Cut out small circles from thin cardboard. Cut eight or sixteen slits into the circles.

2. Take some yarn (or twine as I did) and tape it to the backside.

3. Thread the string forward through the slit at the top and bring it down to the slit at the bottom. Then, bring the yarn up and forward through the slit next to the top one, and backward through the slit next to the bottom one. Continue in the same way, until you have completed two rounds.

4. Once completed, weave the yarn underneath one of the strings, make a loop and knot it.

5. You're done!

Wednesday, April 9, 2014

zigzag...

One of my favorite creations is the triangle sweater I created last year. My son recently outgrew this sweater, so the concurrence of Project Run and Play's theme of this week (design your own fabric) and the "Sew all 26" series at No Big Dill (which has arrived at Z) formed the perfect excuse to make a new shirt. Since summer is on its way, it became a t-shirt. 
Initially, I wanted to use a fresher colour, but at the fabric market, I simply couldn't make up my mind which colour to choose. So in the end I went with the same colours as last time. I upcycled a huge men's shirt, which, despite having a print on the front and back, still had enough blank fabric.
The pattern was made using discharge paste, a thick bleach-like paste that is perfect for freezer paper stenciling (read all about the technique here). 
I stenciled two tags with the pattern. One was used for the collar, the other one was folded, following the example on this beautiful sweater from Nellekus.

So how did I create the stencil? It looks more difficult than it actually is. Let me show you...
First, I cut a rectangle of freezer paper of about 40x25 cm (using the entire width of the paper).
Fold the paper zigzag-wise into eight parts.
Draw two triangles, like this...
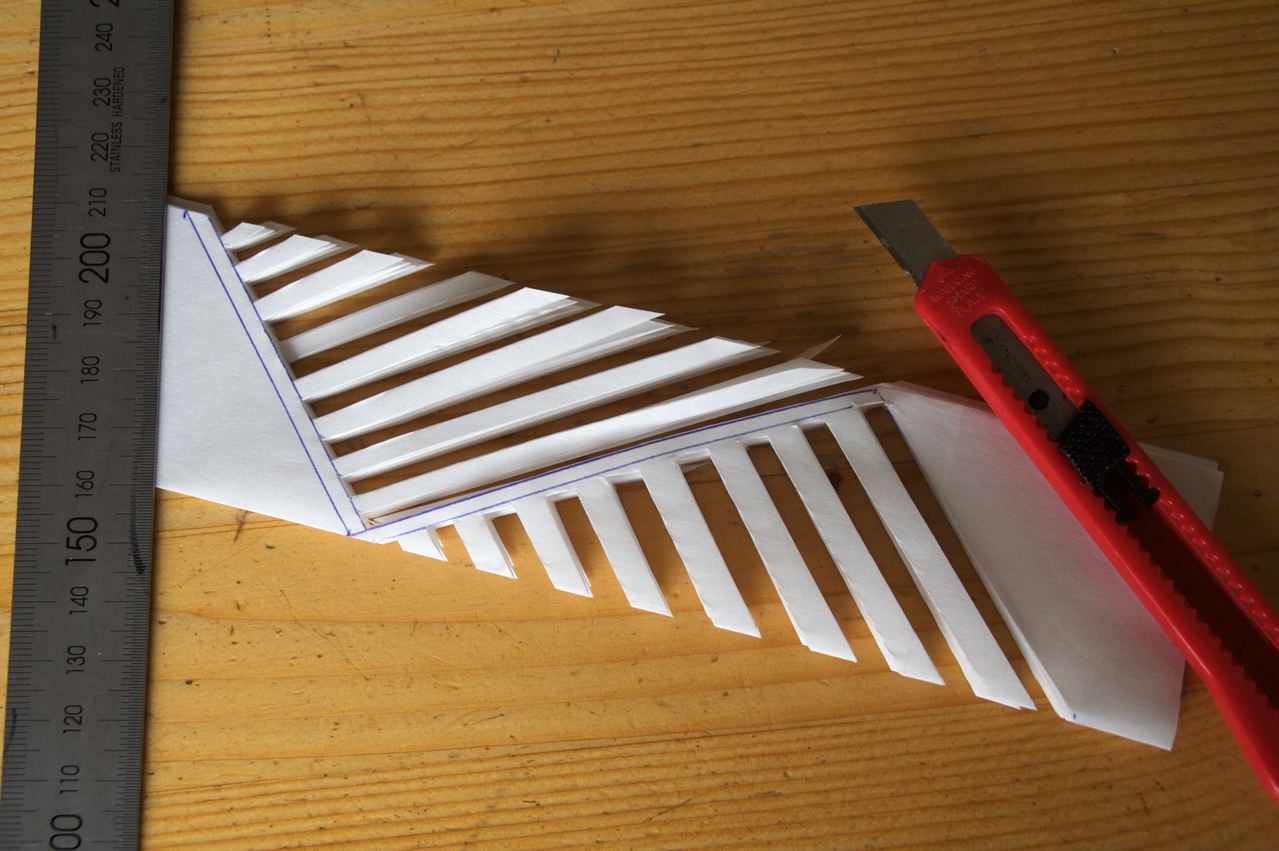
Cut out small strips within the shape of one triangle, using a knife or scissors.
Looking good already...
Cut out strips from the other triangle.
Fold open and admire! 
I accidentally cut out too much here. No problem. You can add the cut-off part(s) when ironing on your stencil.

You can vary the angles, which results in different patterns. As you can see, I used three different patterns for the front, back and sleeves...
In case you wonder, this is my (tomboyish) daughter. Her brother was ill today, but she volunteered to model, in exchange for some M&M's of course...
Linking up to Project Run and PlayKids Clothes Week and No Big Dill's "Sew all 26" series.

Monday, March 24, 2014

One-nap project: sunprinting tutorial


Recently, I did a great discovery! Well, a great 'crafting discovery' that is. I discovered sun printing. I had read about it online, but never tried it, thinking it involved special attributes such as light-sensitive paint, very bright sunlight and whatnot. Turns out, you can do it with regular fabric paint, it is extremely easy, and the effect is quite stunning. It's the perfect nap-time project.
What I learned is that sun-printing does not even require the sun. An old fashioned lamp (which not only emits light, but also heat) can do the trick as well. That's because you need heat instead of light. The heat lets the area around the mask dry faster than underneath the mask, soaking away the paint from under the mask. And this trick works really well, as I'll show today!

So let's do a little tutorial.

What do you need:

  • cotton or knit fabric
  • regular fabric paint
  • a paint brush
  • leaves or other objects that can function as masks
  • a work area (I used a cutting board from the kitchen, but a plastic-covered cardboard will also work)
  • the sun, or an old-fashioned light-bulb type lamp (if there is no sun, or if it is very windy outside)


  1. Soak the fabric and place it on your work area
    Your attributes
  2. Water down your fabric paint and apply it to the fabric. You can mix different colours or leave a part unpainted for an interesting effect.
  3. Put your masks on top of the fabric. I found that young cow parsley (fluitekruid) leaves give a beautiful wispy effect.
    Cow parsley
    Do not use freshly cut leaves, since these will be too crisp. They need to be a bit soft and limp, so that they lay nice and flat on the fabric. Of course you can also use other things as masks: buttons, coins, cutlery, keys, maybe even paper masks (haven't tried that yet). Just use your imagination.
    Waiting for the sun to appear
  4.  Now, the hardest part ;-). Put your mask-covered fabric in the sun and wait. Just wait.

    I told you, the perfect one-nap project
    Have a cup of coffee! And try to suppress your curiosity. Feel. Not dry yet? Have another cup of coffee.... See, I told you this is the perfect nap-time project!
    Let's have another one!


    Wow! Better than freezer paper stenciling

  5. Is your fabric dry? Now, the best part. Take away the masks and reveal your patterns. Pretty, isn't it?
These triangles will become a baby bunting for a little baby girl. Curious about the result? Come back later...

Wednesday, June 26, 2013

Pineapple print


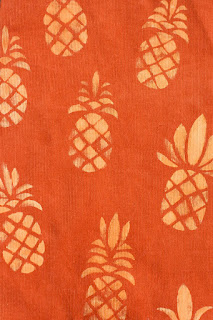
 I created these pineapple fabrics with discharge paste. This is fabulous (and very smelly) stuff. It works like bleach, but since it's much thicker, it's very suitable for freezer paper stenciling. 


I used it before for one of my favorite projects, this triangle sweater.

For my current project, I cut out several pineapples, all slightly different and with different kinds of leaves. I ironed the freezer paper to the fabric and applied the discharge paste. 


When the paste was dry, some bleaching already had occurred. Then I steam ironed it, which activated the bleach even more. The effect is always a surprise; the degree of bleaching and the resulting color depends on the fabric. I've learned that jeans and red fabric don't work as well. But on this brown cotton, the pineapples came out clear and sharp.


I also printed some orange fabric. Curious what I made with my fabric?
Here's a sneak peek.... You can find the results here and here.

Linking up to:
Shaffer Sisters encourage. inspire. uplift. create.

125

Wednesday, May 8, 2013

tutorial for a knight tunic


As promised, here's a tutorial for a knight's tunic. The tutorial is based on this Dutch tutorial from Eloleo. This tunic was made from an old pair of men's jeans. Of course, you can use any fabric you like, but if you're upcycling pants, you'll need a pair with wide legs, in order to have enough fabric. 

Your supplies

Needed for a tunic fitting a 5 to 6 year old:
-Tunic: a pair of adult size pants or jeans, or two pieces of sturdy fabric of 36 x 60 cm (14 x 24 inch)
-Piece of velcro of 5 cm
-Waistband: a strip of cotton of 72 x 9 cm (28 x 3.5 inch)
-150 cm (60 inch) gold, silver or satin ribbon
-Belt: a strip of colored cotton and a strip of the same fabric as used for the tunic, measuring 8 x 130 cm.
-Belt straps: 8 pieces of ribbon of 9 cm long
-Applique: small piece of cotton, fabric paint in various colors, freezer paper
-approx. 100 cm of bias band
Your supplies

Tunic
Open the side seams of the pants with your seam ripper. Keep the double seam intact.
From each leg, cut a rectangle of 60 x 36 cm (24 x 14 inch), with the double seam as midpoint. Try to leave an 8 cm wide strip intact, which you can use for the belt.

Use your seam ripper to open up the seam of the front panel to create a 12 cm long placket. Reinforce the bottom of the placket with a narrow zig zag stitch. Finish the two sides of the placket with bias band.


Sew the tops of the front and back panel together, right sides facing. Finish the raw ends with a serger or zigzag stitch and topstitch the seam. 
Now, cut the neck opening. Make sure that it is wide enough to fit over your kid's head. My opening was 18 cm wide (total circumference 45 cm). Finish the neck opening with bias band.
Neck opening
Finish one of the sides of the front an back panel with the serger. If you don't have a serger, you can use a zigzag stitch or use bias band to finish the side. 
Next, with the front and back panel facing each other, sew the finished sides together from 30 cm from the top to 40 cm from the top of the tunic. Then, sew the strip of cotton to the front and back panels. The top of the strip should be 30 cm from the top of the tunic.

Sew the waistband

Sew a belt strap to both sides of the tunic, and three belt straps to the front and back, spacing them evenly.


Add the belt straps
Finish the waisband by covering the top and bottom seams with the fancy ribbon.

Finish the waistband with some shiny ribbon
Next, finish the other side of the tunic with the serger (or zigzag or bias). Sew one piece of velcro on the outside back piece, and the other on the backside of the front piece of the tunic.

Sew the velcro to the front and back pieces
Now finish the bottom of the tunic. I kept it raw, because I liked the look of unraveled jeans, but you can also finish it with the serger, zigzag or bias.

The bottom edge

Belt
Sew long ends of the strip of cotton and the strip of jeans fabric together, right sides facing. Turn, sew the short ends together and topstitch the belt. Use contrasting thread to create an extra effect (as shown in the belt of the grey tunic).

Topstitch the belt in contrasting color for a nice effect

Shield

Last but not least, create a fancy shield for your little knight. This may be the best part of the whole endeavor, because you can really get creative here.
I happened to have an old table cloth with gold thread woven in it, which lended itself perfectly for the job, but any fabric could work. You could also use one of the back pockets of the jeans, since they already have the right shape.
Use your kid's initials, his/her favorite animal, or find a design online (I googled 'castle shield' and 'dragon shield' to find my templates). I then painted the shield, using a freezer paper stencil and fabric paint.


Next, I ironed fusible interfacing to the bottom of the shield, cut it out and appliqued the shield to the tunic, using a narrow zigzag stitch along the edges.

The finished shield
Done. Your knight is ready to fight a dragon, or save a damsel in distress...